How to Upgrade Your Netbook to Windows 7 Home Premium
Posted
by Matthew Guay
on How to geek
See other posts from How to geek
or by Matthew Guay
Published on Thu, 15 Apr 2010 18:00:00 +0000
Indexed on
2010/04/15
18:14 UTC
Read the original article
Hit count: 1746
Windows 7
|Windows 7 Tips
Would you like more features and flash in Windows on your netbook? Here’s how you can easily upgrade your netbook to Windows 7 Home Premium the easy way.
Most new netbooks today ship with Windows 7 Starter, which is the cheapest edition of Windows 7. It is fine for many computing tasks, and will run all your favorite programs great, but it lacks many customization, multimedia, and business features found in higher editions. Here we’ll show you how you can quickly upgrade your netbook to more full-featured edition of Windows 7 using Windows Anytime Upgrade. Also, if you want to upgrade your laptop or desktop to another edition of Windows 7, say Professional, you can follow these same steps to upgrade it, too.
Please note: This is only for computers already running Windows 7. If your netbook is running XP or Vista, you will have to run a traditional upgrade to install Windows 7.
Upgrade Advisor
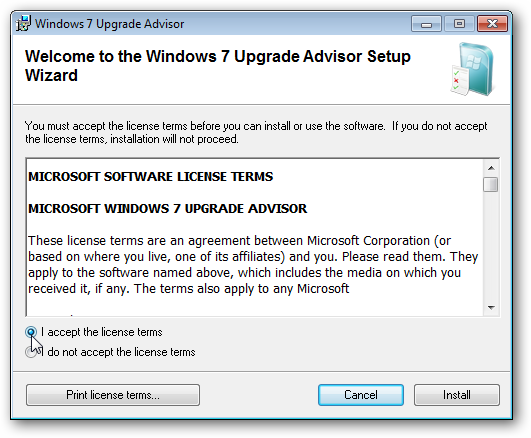
First, let’s make sure your netbook can support the extra features, such as Aero Glass, in Windows 7 Home Premium. Most modern netbooks that ship with Windows 7 Starter can run the advanced features in Windows 7 Home Premium, but let’s check just in case. Download the Windows 7 Upgrade Advisor (link below), and install as normal.

Once it’s installed, run it and click Start Check.

Make sure you’re connected to the internet before you run the check, or otherwise you may see this error message. If you see it, click Ok and then connect to the internet and start the check again.

It will now scan all of your programs and hardware to make sure they’re compatible with Windows 7. Since you’re already running Windows 7 Starter, it will also tell you if your computer will support the features in other editions of Windows 7.

After a few moments, the Upgrade Advisor will show you want it found. Here we see that our netbook, a Samsung N150, can be upgraded to Windows 7 Home Premium, Professional, or Ultimate. We also see that we had one issue, but this was because a driver we had installed was not recognized. Click “See all system requirements” to see what your netbook can do with the new edition.

This shows you which of the requirements, including support for Windows Aero, your netbook meets. Here our netbook supports Aero, so we’re ready to go upgrade.

For more, check out our article on how to make sure your computer can run Windows 7 with Upgrade Advisor.
Upgrade with Anytime Upgrade
Now, we’re ready to upgrade our netbook to Windows 7 Home Premium. Enter “Anytime Upgrade” in the Start menu search,and select Windows Anytime Upgrade.

Windows Anytime Upgrade lets you upgrade using product key you already have or one you purchase during the upgrade process. And, it installs without any downloads or Windows disks, so it works great even for netbooks without DVD drives.
Anytime Upgrades are cheaper than a standard upgrade, and for a limited time, select retailers in the US are offering Anytime Upgrades to Windows 7 Home Premium for only $49.99 if purchased with a new netbook. If you already have a netbook running Windows 7 Starter, you can either purchase an Anytime Upgrade package at a retail store or purchase a key online during the upgrade process for $79.95. Or, if you have a standard Windows 7 product key (full or upgrade), you can use it in Anytime upgrade. This is especially nice if you can purchase Windows 7 cheaper through your school, university, or office.
Purchase an upgrade online
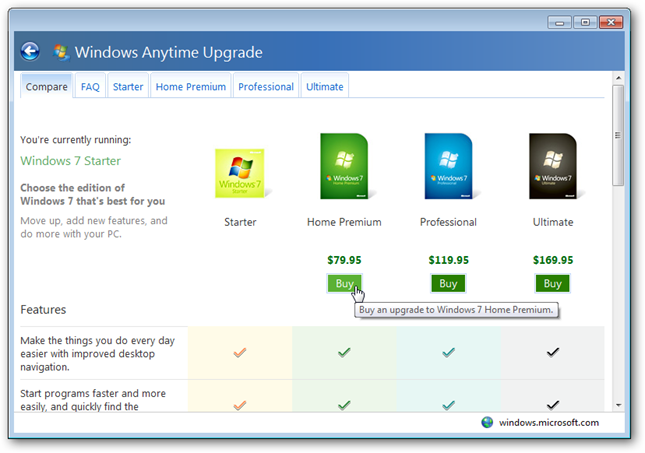
To purchase an upgrade online, click “Go online to choose the edition of Windows 7 that’s best for you”.

Here you can see a comparison of the features of each edition of Windows 7. Note that you can upgrade to either Home Premium, Professional, or Ultimate. We chose home Premium because it has most of the features that home users want, including Media Center and Aero Glass effects. Also note that the price of each upgrade is cheaper than the respective upgrade from Windows XP or Vista. Click buy under the edition you want.

Enter your billing information, then your payment information. Once you confirm your purchase, you will directly be taken to the Upgrade screen. Make sure to save your receipt, as you will need the product key if you ever need to reinstall Windows on your computer.

Upgrade with an existing product key
If you purchased an Anytime Upgrade kit from a retailer, or already have a Full or Upgrade key for another edition of Windows 7, choose “Enter an upgrade key”.

Enter your product key, and click Next. If you purchased an Anytime Upgrade kit, the product key will be located on the inside of the case on a yellow sticker.

The key will be verified as a valid key, and Anytime Upgrade will automatically choose the correct edition of Windows 7 based on your product key. Click Next when this is finished.

Continuing the Upgrade process
Whether you entered a key or purchased a key online, the process is the same from here on. Click “I accept” to accept the license agreement.

Now, you’re ready to install your upgrade. Make sure to save all open files and close any programs, and then click Upgrade.

The upgrade only takes about 10 minutes in our experience but your mileage may vary. Any available Microsoft updates, including ones for Office, Security Essentials, and other products, will be installed before the upgrade takes place.

After a couple minutes, your computer will automatically reboot and finish the installation. It will then reboot once more, and your computer will be ready to use! Welcome to your new edition of Windows 7!

Here’s a before and after shot of our desktop. When you do an Anytime Upgrade, all of your programs, files, and settings will be just as they were before you upgraded. The only change we noticed was that our pinned taskbar icons were slightly rearranged to the default order of Internet Explorer, Explorer, and Media Player. Here’s a shot of our desktop before the upgrade. Notice that all of our pinned programs and desktop icons are still there, as well as our taskbar customization (we are using small icons on the taskbar instead of the default large icons).
Before, with the Windows 7 Starter background and the Aero Basic theme:

And after, with Aero Glass and the more colorful default Windows 7 background.

All of the features of Windows 7 Home Premium are now ready to use. The Aero theme was activate by default, but you can now customize your netbook theme, background, and more with the Personalization pane. To open it, right-click on your desktop and select Personalize.

You can also now use Windows Media Center, and can play-back DVD movies using an external drive.

One of our favorite tools, the Snipping Tool, is also now available for easy screenshots and clips.

Activating you new edition of Windows 7
You will still need to activate your new edition of Windows 7. To do this right away, open the start menu, right-click on Computer, and select Properties.

Scroll to the bottom, and click “Activate Windows Now”.

Make sure you’re connected to the internet, and then select “Activate Windows online now”.

Activation may take a few minutes, depending on your internet connection speed.

When it is done, the Activation wizard will let you know that Windows is activated and genuine. Your upgrade is all finished!

Conclusion
Windows Anytime Upgrade makes it easy, and somewhat cheaper, to upgrade to another edition of Windows 7. It’s useful for desktop and laptop owners who want to upgrade to Professional or Ultimate, but many more netbook owners will want to upgrade from Starter to Home Premium or another edition.
Links
Download the Windows 7 Upgrade Advisor
Windows Team Blog:
Anytime Upgrade Special with new PC purchase
| Similar Articles | Productive Geek Tips |
| Latest Software Reviews | Tinyhacker Random Tips |
© How to geek or respective owner
