Change Desktop Resolution With a Keyboard Shortcut
Posted
by Matthew Guay
on How to geek
See other posts from How to geek
or by Matthew Guay
Published on Thu, 20 May 2010 21:00:00 +0000
Indexed on
2010/05/20
21:21 UTC
Read the original article
Hit count: 746
Desktop Customization
|Keyboard Ninja
Do you find yourself changing your monitor resolution several times a day? If so, you might like this handy way to set a keyboard shortcut for your most-used resolutions.
Most users rarely have to change their screen resolution often, as LCD monitors usually only look best at their native resolution. But netbooks present a unique situation, as their native resolution is usually only 1024×600. Some newer netbooks offer higher resolutions which may not looks as crisp as the native resolution but can be handy for using a program that expects a higher resolution. This is the perfect situation for a keyboard shortcut to help you change the resolution without having to hassle with dialogs and menus each time, and HRC – HotKey Resolution Changer makes it easy to do.
Create Keyboard Shortcuts
Download the HRC – HotKey Resolution Changer (link below), unzip, and then run HRC.exe in the folder.

This will start a tray icon, and will not automatically open the HRC window. You don’t have to install HRC. Double-click the tray icon to open it.
Note: Windows 7 automatically hides new tray icons, so if you can’t see it, click the arrow to see the hidden tray icons.

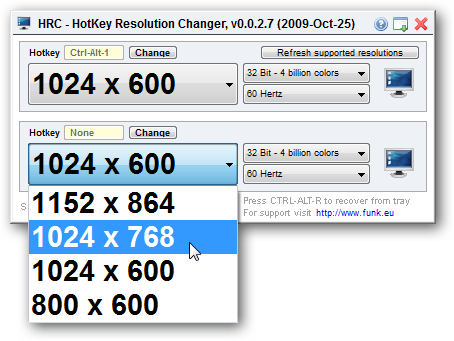
By default, HRC will show two entries with your default resolutions, color depth, and refresh rate.

Add a keyboard shortcut by clicking the Change button over the resolution. Press the keyboard shortcut you want to press to switch to that resolution; we entered Ctrl+Alt+1 for our default resolution. Make sure not to use a keyboard shortcut you use in another application, as this will override it. Click Set when you’ve entered the hotkey(s) you want.

Now, on the second entry, select the resolution you want for your alternate resolution. The drop-down list will only show your monitor’s supported resolutions, so you don’t have to worry about choosing an incorrect resolution. You can also set a different color depth or refresh rate for this resolution. Now add a keyboard shortcut for this resolution as well.

You can set keyboard shortcuts for up to 9 different resolutions with HRC. Click the Select number of HotKeys button on the left, and choose the number of resolutions you want to set. Here we have unique keyboard shortcuts for our three most-used resolutions on our netbook.

HRC must be kept running to use the keyboard shortcuts, so click the Minimize to tray icon which is the second icon to the right. This will keep it running in the tray.

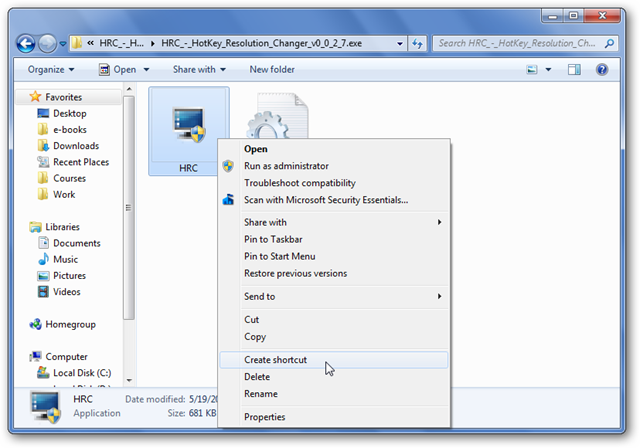
If you want to be able to change your resolution anytime, you’ll want HRC to automatically start with Windows. Create a shortcut to HRC, and paste it into your Windows startup folder. You can easily open this folder by entering the following in the Run command or in the address bar in Explorer:
%appdata%\Microsoft\Windows\Start Menu\Programs\Startup

Conclusion
HRC- HotKey Resolution Changer gives you a great way to quickly change your screen resolution with a keyboard shortcut. Whether or not you love keyboard shortcuts, this is still a much easier way to switch between your most commonly used resolutions.
Download HRC – HotKey Resolution Changer
| Similar Articles | Productive Geek Tips |
| Latest Software Reviews | Tinyhacker Random Tips |
|
© How to geek or respective owner
