Start Learning Ruby with IronRuby – Setting up the Environment
Posted
by kazimanzurrashid
on ASP.net Weblogs
See other posts from ASP.net Weblogs
or by kazimanzurrashid
Published on Wed, 16 Jun 2010 09:34:49 GMT
Indexed on
2010/06/16
9:42 UTC
Read the original article
Hit count: 1083
Recently I have decided to learn Ruby and for last few days I am playing with IronRuby. Learning a new thing is always been a fun and when it comes to adorable language like Ruby it becomes more entertaining.
Like any other language, first we have to create the development environment. In order to run IronRuby we have to download the binaries form the IronRuby CodePlex project. IronRuby supports both .NET 2.0 and .NET 4, but .NET 4 is the recommended version, you can download either the installation or the zip file. If you download the zip file make sure you added the bin directory in the environment path variable. Once you are done, open up the command prompt and type :
ir –v
It should print message like:
IronRuby 1.0.0.0 on .NET 4.0.30319.1
The ir is 32bit version of IronRuby, if you want to use 64bit you can try ir64.
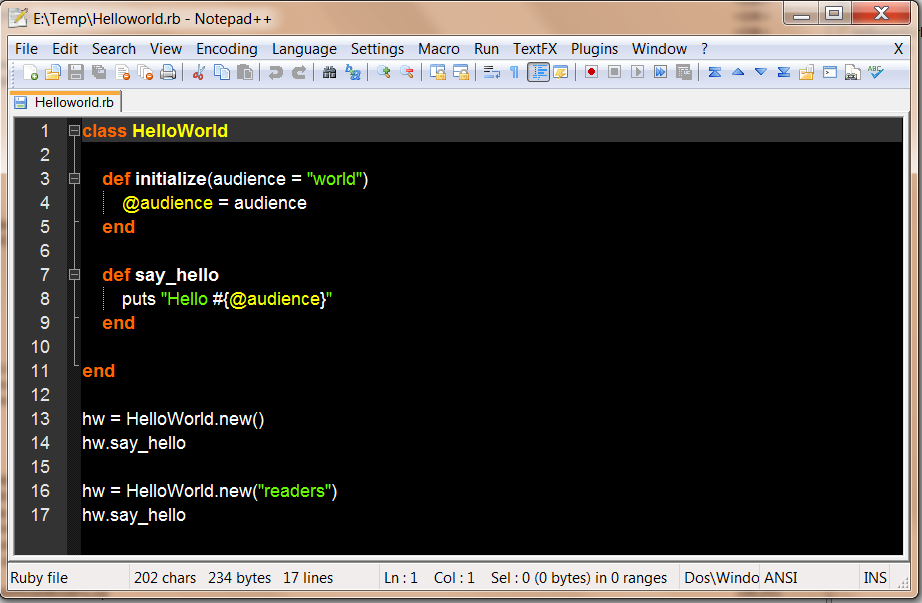
Next, we have to find a editor where we can write our Ruby code as there is currently no integration story of IronRuby with Visual Studio like its twin Iron Python. Among the free IDEs only SharpDevelop has the IronRuby support but it does not have auto complete or debugging built into it, only thing that it supports is the syntax highlighting, so using a text editor which has the same features is nothing different comparing to it. To play with the IronRuby we will be using Notepad++, which can be downloaded from its sourceforge download page. The Notepad++ does have a nice syntax highlighting support :
I am using the Vibrant Ink with some little modification.
The next thing we have to do is configure the Notepad++ that we can run the Ruby script in IronRuby inside the Notepad++. Lets create a batch(.bat) file in the IronRuby bin directory, which will have the following content:
@echo off cls
call ir %1
pause
This will make sure that the console will be paused once we run the script.
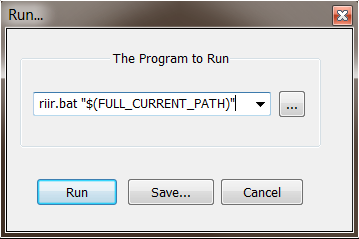
Now click Run->Run in the Notepad++, it will bring up the run dialog and put the following command in the textbox:
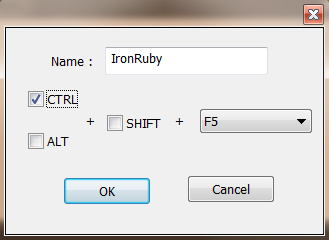
riir.bat "$(FULL_CURRENT_PATH)" Click the save which will bring another dialog.
Type Iron Ruby and assign the shortcut to ctrl + f5 (Same as Visual Studio Start without Debugging) and click ok.
Once you are done you will find the IronRuby in the Run menu. Now press ctrl + f5, we will find the ruby script running in the IronRuby.
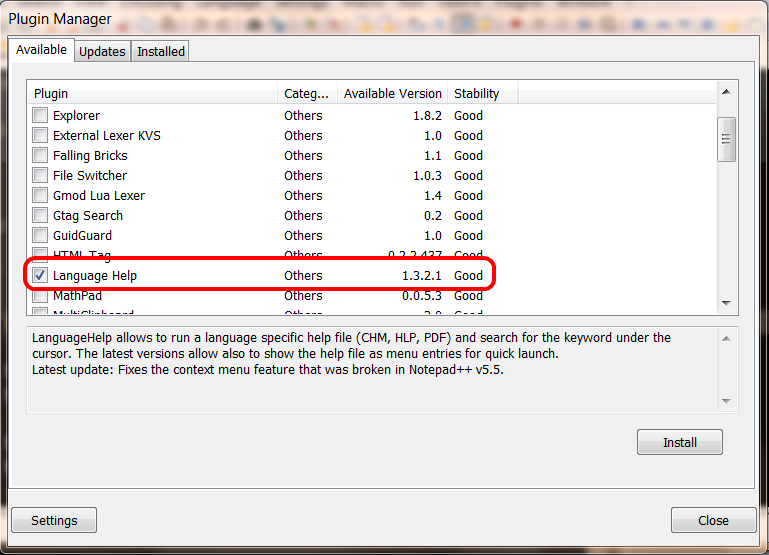
Now there are one last thing that we would like to add which is poor man’s context sensitive help. First, download the ruby language help file from the Ruby Installer site and extract into a directory. Next we will have to install the Language Help Plug-in of Notepad++, click Plugins->Plugin Manger –>Show Plugin Manager and scroll down until you find the plug-in the list, now check the plug-in and click install. Once it is installed it will prompt you to restart the Notepad++, click yes.
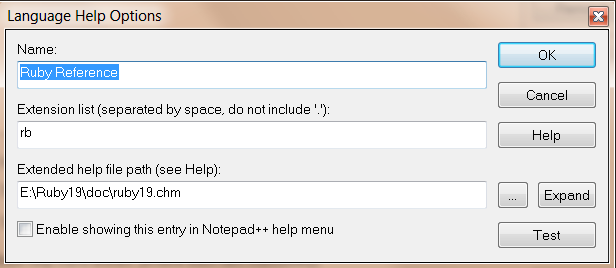
When the Notepad++ restarts, click the Plugins –> Language Help –> Options –> add and enter the following details and click ok:
The chm file location can be different depending upon where you extracted it.
Now when you put your in any of ruby keyword and press ctrl + f1 it will take you to the help topic of that keyword.
For example, when my caret is in the each of the following code and I press ctrl + f1, it will take me to the each api doc of Array.
def loop_demo
	(1..10).each{ |n| puts n}
end

loop_demo
That’s it for today.
Happy Ruby coding.
© ASP.net Weblogs or respective owner
