How to Customize Fonts and Colors for Gnome Panels in Ubuntu Linux
Posted
by The Geek
on How to geek
See other posts from How to geek
or by The Geek
Published on Fri, 18 Feb 2011 09:00:13 +0000
Indexed on
2011/02/18
15:27 UTC
Read the original article
Hit count: 485
linux

Earlier this week we showed you how to make the Gnome Panels totally transparent, but you really need some customized fonts and colors to make the effect work better. Here’s how to do it.
This article is the first part of a multi-part series on how to customize the Ubuntu desktop, written by How-To Geek reader and ubergeek, Omar Hafiz.
Changing the Gnome Colors the Easy Way
You’ll first need to install Gnome Color Chooser which is available in the default repositories (the package name is gnome-color-chooser). Then go to System > Preferences > Gnome Color Chooser to launch the program.
When you see all these tabs you immediately know that Gnome Color Chooser does not only change the font color of the panel, but also the color of the fonts all over Ubuntu, desktop icons, and many other things as well.

Now switch to the panel tab, here you can control every thing about your panels. You can change font, font color, background and background color of the panels and start menus. Tick the “Normal” option and choose the color you want for the panel font. If you want you can change the hover color of the buttons on the panel by too.
A little below the color option is the font options, this includes the font, font size, and the X and Y positioning of the font. The first two options are pretty straight forward, they change the typeface and the size.

The X-Padding and Y-Padding may confuse you but they are interesting, they may give a nice look for your panels by increasing the space between items on your panel like this:
X-Padding:

Y-Padding:

The bottom half of the window controls the look of your start menus which is the Applications, Places, and Systems menus. You can customize them just the way you did with the panel.


Alright, this was the easy way to change the font of your panels.
Changing the Gnome Theme Colors the Command-Line Way
The other hard (not so hard really) way will be changing the configuration files that tell your panel how it should look like. In your Home Folder, press Ctrl+H to show the hidden files, now find the file “.gtkrc-2.0”, open it and insert this line in it. If there are any other lines in the file leave them intact.
include “/home/<username>/.gnome2/panel-fontrc”
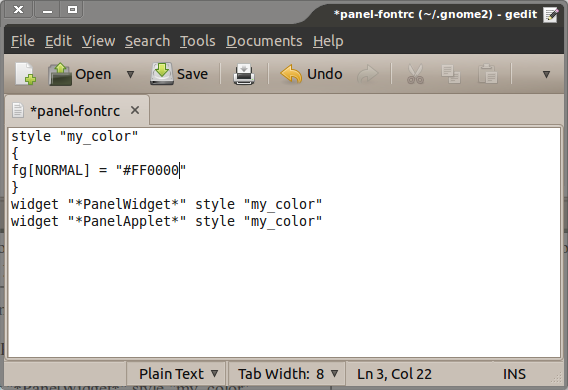
Don’t forget to replace the <user_name> with you user account name. When done close and save the file. Now navigate the folder “.gnome2” from your Home Folder and create a new file and name it “panel-fontrc”. Open the file you just created with a text editor and paste the following in it:
style “my_color”
{
fg[NORMAL] = “#FF0000”
}
widget “*PanelWidget*” style “my_color”
widget “*PanelApplet*” style “my_color”

This text will make the font red. If you want other colors you’ll need to replace the Hex value/HTML Notation (in this case #FF0000) with the value of the color you want. To get the hex value you can use GIMP, Gcolor2 witch is available in the default repositories or you can right-click on your panel > Properties > Background tab then click to choose the color you want and copy the Hex value. Don’t change any other thing in the text. When done, save and close. Now press Alt+F2 and enter “killall gnome-panel” to force it to restart or you can log out and login again.
Most of you will prefer the first way of changing the font and color for it’s ease of applying and because it gives you much more options but, some may not have the ability/will to download and install a new program on their machine or have reasons of their own for not to using it, that’s why we provided the two way.
© How to geek or respective owner
