Building and Deploying Windows Azure Web Sites using Git and GitHub for Windows
Posted
by shiju
on ASP.net Weblogs
See other posts from ASP.net Weblogs
or by shiju
Published on Fri, 08 Jun 2012 13:53:03 GMT
Indexed on
2012/06/08
16:41 UTC
Read the original article
Hit count: 1078
Microsoft Windows Azure team has released a new version of Windows Azure which is providing many excellent features. The new Windows Azure provides Web Sites which allows you to deploy up to 10 web sites for free in a multitenant shared environment and you can easily upgrade this web site to a private, dedicated virtual server when the traffic is grows. The Meet Windows Azure Fact Sheet provides the following information about a Windows Azure Web Site:
- Windows Azure Web Sites enable developers to easily build and deploy websites with support for multiple frameworks and popular open source applications, including ASP.NET, PHP and Node.js. With just a few clicks, developers can take advantage of Windows Azure’s global scale without having to worry about operations, servers or infrastructure.
- It is easy to deploy existing sites, if they run on Internet Information Services (IIS) 7, or to build new sites, with a free offer of 10 websites upon signup, with the ability to scale up as needed with reserved instances.
- Windows Azure Web Sites includes support for the following:
- Multiple frameworks including ASP.NET, PHP and Node.js
- Popular open source software apps including WordPress, Joomla!, Drupal, Umbraco and DotNetNuke
- Windows Azure SQL Database and MySQL databases
- Multiple types of developer tools and protocols including Visual Studio, Git, FTP, Visual Studio Team Foundation Services and Microsoft WebMatrix
Signup to Windows and Enable Azure Web Sites
You can signup for a 90 days free trial account in Windows Azure from here. After creating an account in Windows Azure, go to https://account.windowsazure.com/ , and select to preview features to view the available previews.
In the Web Sites section of the preview features, click “try it now” which will enables the web sites feature
Create Web Site in Windows Azure
To create a web sites, login to the Windows Azure portal, and select Web Sites from and click New icon from the left corner
Click WEB SITE, QUICK CREATE and put values for URL and REGION dropdown.
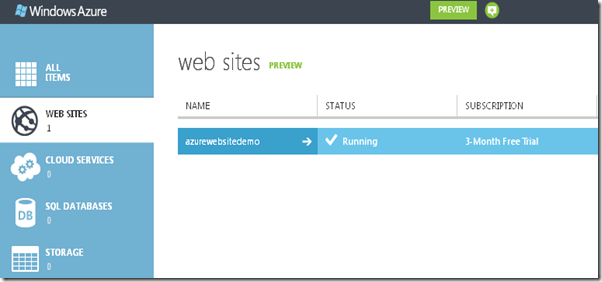
You can see the all web sites from the dashboard of the Windows Azure portal
Set up Git Publishing
Select your web site from the dashboard, and select Set up Git publishing
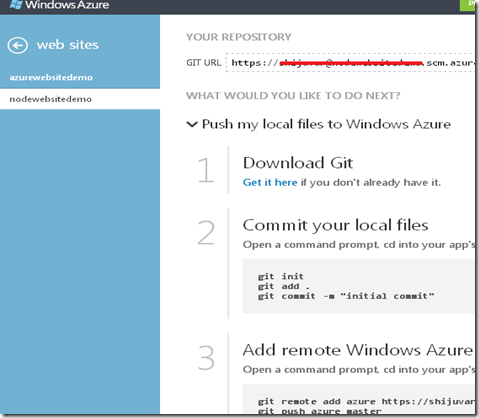
To enable Git publishing , you must give user name and password which will initialize a Git repository
Clone Git Repository
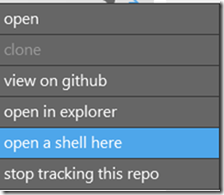
We can use GitHub for Windows to publish apps to non-GitHub repositories which is well explained by Phil Haack on his blog post. Here we are going to deploy the web site using GitHub for Windows. Let’s clone a Git repository using the Git Url which will be getting from the Windows Azure portal. Let’s copy the Git url and execute the “git clone” with the git url. You can use the Git Shell provided by GitHub for Windows. To get it, right on the GitHub for Windows, and select open shell here as shown in the below picture.
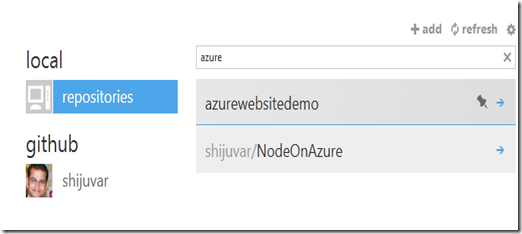
When executing the Git Clone command, it will ask for a password where you have to give password which specified in the Windows Azure portal. After cloning the GIT repository, you can drag and drop the local Git repository folder to GitHub for Windows GUI. This will automatically add the Windows Azure Web Site repository onto GitHub for Windows where you can commit your changes and publish your web sites to Windows Azure.
Publish the Web Site using GitHub for Windows
We can add multiple framework level files including ASP.NET, PHP and Node.js, to the local repository folder can easily publish to Windows Azure from GitHub for Windows GUI. For this demo, let me just add a simple Node.js file named Server.js which handles few request handlers.
1: var http = require('http');
2: var port=process.env.PORT;
3: var querystring = require('querystring');
4: var utils = require('util');
5: var url = require("url");
6:
7: var server = http.createServer(function(req, res) {
8: switch (req.url) { //checking the request url
9: case '/':
10: homePageHandler (req, res); //handler for home page
11: break;
12: case '/register':
13: registerFormHandler (req, res);//hamdler for register
14: break;
15: default:
16: nofoundHandler (req, res);// handler for 404 not found
17: break;
18: }
19: });
20: server.listen(port);
21: //function to display the html form
22: function homePageHandler (req, res) {
23: console.log('Request handler home was called.');
24: res.writeHead(200, {'Content-Type': 'text/html'});
25: var body = '<html>'+
26: '<head>'+
27: '<meta http-equiv="Content-Type" content="text/html; '+
28: 'charset=UTF-8" />'+
29: '</head>'+
30: '<body>'+
31: '<form action="/register" method="post">'+
32: 'Name:<input type=text value="" name="name" size=15></br>'+
33: 'Email:<input type=text value="" name="email" size=15></br>'+
34: '<input type="submit" value="Submit" />'+
35: '</form>'+
36: '</body>'+
37: '</html>';
38: //response content
39: res.end(body);
40: }
41: //handler for Post request
42: function registerFormHandler (req, res) {
43: console.log('Request handler register was called.');
44: var pathname = url.parse(req.url).pathname;
45: console.log("Request for " + pathname + " received.");
46: var postData = "";
47: req.on('data', function(chunk) {
48: // append the current chunk of data to the postData variable
49: postData += chunk.toString();
50: });
51: req.on('end', function() {
52: // doing something with the posted data
53: res.writeHead(200, "OK", {'Content-Type': 'text/html'});
54: // parse the posted data
55: var decodedBody = querystring.parse(postData);
56: // output the decoded data to the HTTP response
57: res.write('<html><head><title>Post data</title></head><body><pre>');
58: res.write(utils.inspect(decodedBody));
59: res.write('</pre></body></html>');
60: res.end();
61: });
62: }
63: //Error handler for 404 no found
64: function nofoundHandler(req, res) {
65: console.log('Request handler nofound was called.');
66: res.writeHead(404, {'Content-Type': 'text/plain'});
67: res.end('404 Error - Request handler not found');
68: }
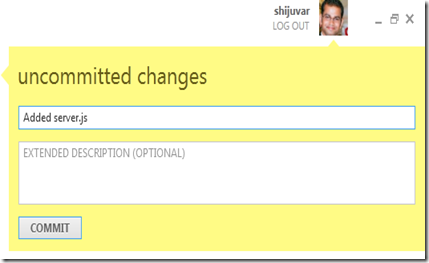
If there is any change in the local repository folder, GitHub for Windows will automatically detect the changes. In the above step, we have just added a Server.js file so that GitHub for Windows will detect the changes. Let’s commit the changes to the local repository before publishing the web site to Windows Azure.
After committed the all changes, you can click publish button which will publish the all changes to Windows Azure repository. The following screen shot shows deployment history from the Windows Azure portal.
GitHub for Windows is providing a sync button which can use for synchronizing between local repository and Windows Azure repository after making any commit on the local repository after any changes.
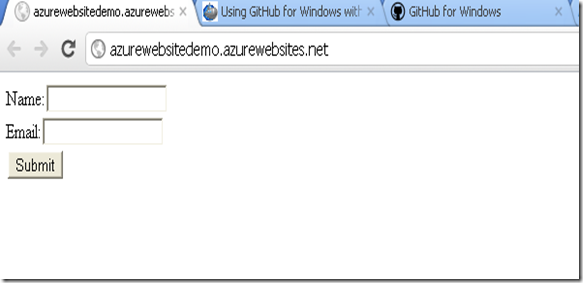
Our web site is running after the deployment using Git
Summary
Windows Azure Web Sites lets the developers to easily build and deploy websites with support for multiple framework including ASP.NET, PHP and Node.js and can easily deploy the Web Sites using Visual Studio, Git, FTP, Visual Studio Team Foundation Services and Microsoft WebMatrix. In this demo, we have deployed a Node.js Web Site to Windows Azure using Git. We can use GitHub for Windows to publish apps to non-GitHub repositories and can use to publish Web SItes to Windows Azure.
© ASP.net Weblogs or respective owner


