Change default language settings in Visual Studio 2012
Posted
by sreejukg
on ASP.net Weblogs
See other posts from ASP.net Weblogs
or by sreejukg
Published on Mon, 08 Oct 2012 20:12:00 GMT
Indexed on
2012/10/08
21:38 UTC
Read the original article
Hit count: 621
.NET
|.NET Framework
|c#
|General Software Developm
|Visual Studio
|VIsual Studio 2012
The first thing you need to do after the installation of Visual Studio 2012 is to choose the IDE preferences. Once you select your preferred collection of settings, the IDE will always choose dialogs and other options according to your selection. Nowadays developer’s needs to work with different programming environments and due to this, developers might need to reset the default settings. In this article, I am going to demonstrate how you can change the default settings in Visual Studio 2012.
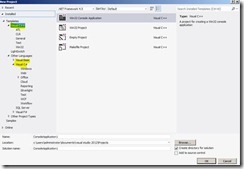
For the purpose of this demonstration, I have installed Visual Studio 2012 and selected C++ as my default environment settings. So now when I go to file -> new project, it will give me C++ templates by default as follows. If you want to select another language, you need to expand Other Languages section and select C# or VB.
Now I am going to change these default settings. I am going to change the default language preference to C#. In Visual Studio 2012, go to tools menu and select Import and Export Settings.
Here you have 3 options; one is to export the current settings so that the settings are saved for future use. Also you can import previously saved settings. The last option available is to reset it to default. It is a good Idea to export your settings and import it as you need in later stages. To reset the settings to default select the Reset option and click next.
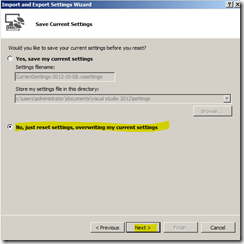
Now Visual Studio will ask you to whether you would like to save the settings, which can be used in future to restore. Select any one option and click next. For the purpose of this demo, I have selected not to save the settings. Click Next button to continue.
Now Visual Studio will bring you the similar dialog that appears just after installation to select your IDE settings. Select the required settings from the available list and click Finish button.
Click Finish once you are done. If everything OK, you will see the success message as below.
Now go to file -> new Project, you will see the selected language appear by default. I selected C# in the previous step and the new project dialog appears as follows.
Changing IDE settings in Visual Studio 2012 is very easy and straight forward.
© ASP.net Weblogs or respective owner


