Remove Office 2010 Beta and Reinstall Office 2007
Posted
by Matthew Guay
on How to geek
See other posts from How to geek
or by Matthew Guay
Published on Thu, 01 Apr 2010 18:00:00 +0000
Indexed on
2010/04/01
18:13 UTC
Read the original article
Hit count: 1345
Office
|Office 2010
Have you tried out the Office 2010 beta, but want to go back to Office 2007? Here’s a step-by-step tutorial on how to remove your Office 2010 beta and reinstall your Office 2007.
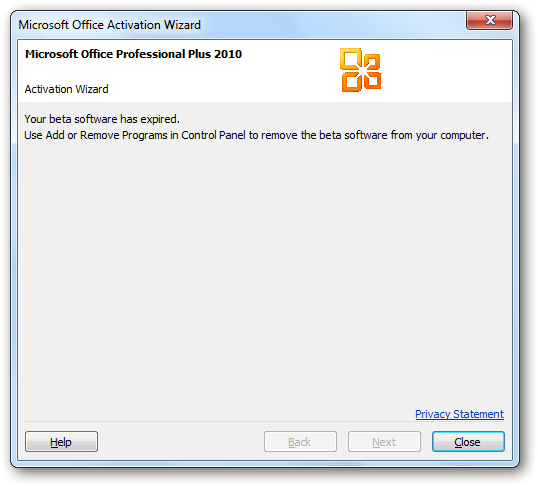
The Office 2010 beta will expire on October 31, 2010, at which time you may see a dialog like the one below. At that time, you will need to either upgrade to the final release of Office 2010, or reinstall your previous version of Office.

Our computer was running the Office 2010 Home and Business Click to Run beta, and after uninstalling it we reinstalled Office 2007 Home and Student. This was a Windows Vista computer, but the process will be exactly the same on Windows XP, Vista, or Windows 7. Additionally, the process to reinstall Office 2007 will be exactly the same regardless of the edition of Office 2007 you’re using.
However, please note that if you are running a different edition of Office 2010, especially the 64 bit version, the process may be slightly different. We will cover this scenario in another article.
Remove Office 2010 Click to Run Beta:
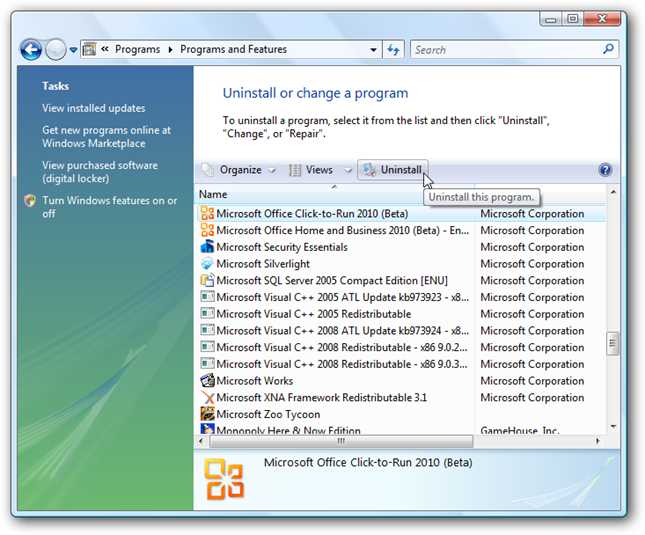
To remove Office 2010 Click to Run Beta, open Control Panel and select Uninstall a Program.

If your computer is running Windows 7, enter “Uninstall a program” in your Start menu search.

Scroll down, select “Microsoft Office Click-to-Run 2010 (Beta)”, and click the Uninstall button on the toolbar. Note that there will be two entries for Office, so make sure to select the “Click-to-Run” entry.

This will automatically remove all of Office 2010 and its components. Click Yes to confirm you want to remove it.

Office 2010 beta uninstalled fairly quickly, and a reboot will be required. Once your computer is rebooted, Office 2010 will be entirely removed.

Reinstall Office 2007
Now, you’re to the easy part. Simply insert your Office 2007 CD, and it should automatically startup the setup. If not, open Computer and double-click on your CD drive.

Now, double-click on setup.exe to start the installation.

Enter your product key, and click Continue…

Click Install Now, or click Customize if you want to change the default installation settings.

Wait while Office 2007 installs…it takes around 15 to 20 minutes in our experience. Once it’s finished close the installer.

Now, open one of the Office applications. A popup will open asking you to activate Office. Make sure you’re connected to the internet, and click next; otherwise, you can select to activate over the phone if you do not have internet access.

This should only take a minute, and Office 2007 will be activated and ready to run.

Everything should work just as it did before you installed Office 2010. Enjoy!

Office Updates
Make sure to install the latest updates for Office 2007, as these are not included in your disk. Check Windows Update (search for Windows Update in the Start menu search), and install all of the available updates for Office 2007, including Service Pack 2.

Conclusion
This is a great way to keep using Office even if you don’t decide to purchase Office 2010 after it is released. Additionally, if you’re were using another version of Office, such as Office 2003, then reinstall it as normal after following the steps to remove Office 2010.
| Similar Articles | Productive Geek Tips |
| Latest Software Reviews | Tinyhacker Random Tips |
© How to geek or respective owner
