How To Add Image And Text Watermarks to MS Word Documents
Posted
by Kavitha
on Tech Dreams
See other posts from Tech Dreams
or by Kavitha
Published on Mon, 21 Feb 2011 02:30:00 +0000
Indexed on
2011/02/21
7:31 UTC
Read the original article
Hit count: 659
 Watermark is a faint image that appears behind your text in MS Word Documents. Draft/Confidential are the most common background watermarks that we see in the documents circulated at office. MS Word 2007/2010 makes it very easy add watermarks as well as customize them based on the requirements.
Add Image Watermark To MS Word Document
To add image watermark to your document follow these steps
1. Switch to Page Layout tab of Ribbon Menu
2. Click on Watermark drop down menu and choose Custom Watermark option
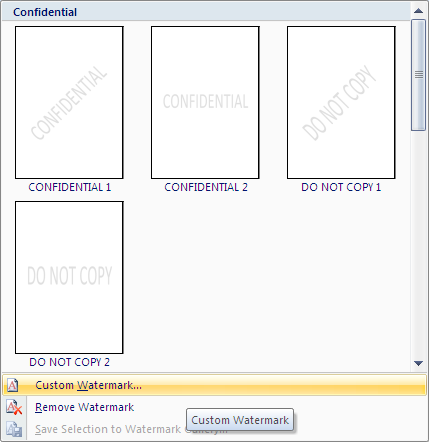
3. Choose Picture watermark option, click on the button Select Picture.. and choose watermark image
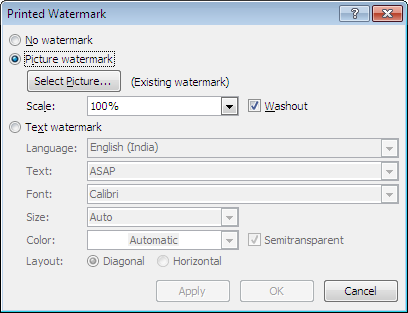
4. Click Ok. That all. You are done.

Add Text Watermark To MS Word Document
To add image watermark to your document follow these steps
1. Switch to Page Layout tab of Ribbon Menu
2. Click on Watermark drop down menu
3. In the opened window, you can select one of the predefined text watermarks like Confidential, Draft, ASAP, URGENT, etc. If you are looking for one of these watermarks, you can choose them otherwise click on the option Custom Watermark…
4. Choose the option Text watermark and enter the text you want to set as watermark in the input area Text: (highlighted below).
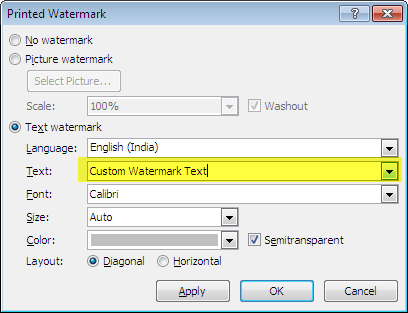
5. Click on OK button. That’s all.
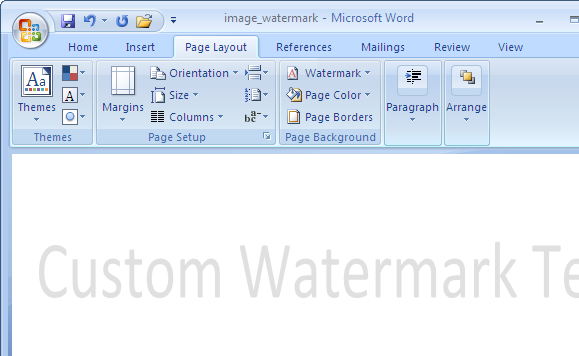
This article titled,How To Add Image And Text Watermarks to MS Word Documents, was originally published at Tech Dreams. Grab our rss feed or fan us on Facebook to get updates from us.
© Tech Dreams or respective owner