Nintex workflow tips and tricks
Posted
by ybbest
on YBBest
See other posts from YBBest
or by ybbest
Published on Fri, 18 Jan 2013 10:03:12 +0000
Indexed on
2013/06/24
16:40 UTC
Read the original article
Hit count: 522
Nintex Workflow 2010
|SharePoint 2010
|Workflow
|Nintex
|Nintex Workflow
|Nintex2010
Here are some Nintex 2010 workflow related tips and tricks and I will keep updating them.
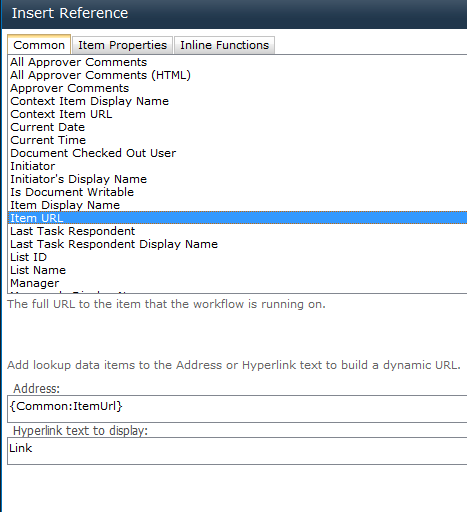
1. How to add a link in email using Nintex.
a. Go to the insert tab and select Link

b. Select the url you’d like to set for the link

c. After you have done this , you will see the Link is inserted into the email.

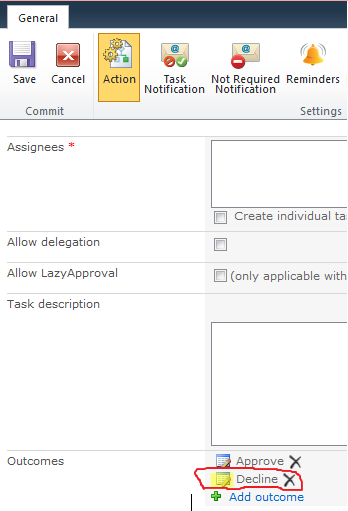
2. How to make the Flexi task reject option called “Decline” and make the comments mandatory.
a. Open the Flexi task action config prompt as shown below
b.Click on the edit icon and change the settings from
TO
3. When saving or publishing Nintex workflow and receiving the following errors:
Server was unable to process request. —> The file hxtp://../NintexWorkflows/Workflowname/Workflowname.xoml is checked out for editing by Domain/Username.
To Fix it , you can perform the following steps:
a.In the publish dialogue, uncheck “Overwrite existing version” and rename the workflow.
b.Delete the old workflow which was checked out
c.Publish the new workflow again with the old name
d.Delete the “temporary” workflow again
© YBBest or respective owner


